Showing posts with label Force on Force. Show all posts

2010/12/19

A Tomorrow's War scenario for Star Wars


AMBUSH AT TEMPROS IV FOR TOMORROW'S WAR

La planète Tampros IV abrite une base rebelle assiégée par les forces de l’Empire qui ont entrepris un bombardement orbital avant de donner l’assaut.
Tout le monde a pu être évacué sauf les troupes chargées de détruire les documents confidentiels et de miner la base.
Le capitaine Barka mène cette arrière garde. Il est impératif de conduire en lieux sûrs Syl Plyton, maître-espion bothan.
Les impériaux cherchent à le capturer vivant. Des chasseurs de primes à la solde des Hutts sont à la recherche de Cal Madsen et Drewbaca (morts ou vifs) dont le vaisseau doit permettre de quitter la planète.

The planet Tampros IV is home to a rebel base besieged by the forces of the Empire who have undertaken an orbital bombardment before the assault.
Everyone has been evacuated except for troops who have to destroy confidential documents and undermining the base.
The captain Barka leads the rearguard. It is essential to drive Syl Plyton, Bothan master spy to safety.
The Imperials are trying to capture him alive. Bounty hunters in the pay of the Hutts are looking to Cal Madsen and Drewbaca (dead or alive) who are the pilots of the ship that should drive all them off the planet.


Les Rebelles doivent sortir du champ de bataille par un petit côté de la carte.

The Rebels are to leave the battlefield through a small side of the map.


SPECIAL RULES

Ruins & craters area: difficult terrain (half movement) and counting as a protective cover.
Abandoning casualties: Imperials do not suffer consequences when abandoning casualties.
Initiative : Empire for the first turn.

FORCES (ALL TL 2)

Stormtroopers
Fireteam : 4 (3 troopers + 1 NCO or 2 troopers + 1 Support weapon + 1 NCO) x 6 teams
Q D8
M D10
Confidence : High
Supply : Normal
Armor : carapace 2D
Weapon : blaster (= laser)
Support : heavy blaster (Lt, AP:1, AT:1)
FIREPOWER : 5D or 6D (1D/figure + support + laser)

Stormtroopers officer Lornak
Positive Leader
Q D8
M D12
Confidence : High
Supply : Normal
Armor : carapace 2D
Weapon : blaster (= laser)
Support : -
FIREPOWER : 1D

Imperial navy captain Lenor
Negative Leader
Q D8
M D10
Confidence : High
Supply : Normal
Armor : -
Weapon : blaster (= laser)
Support : -
FIREPOWER : 1D

Rebels
Fireteam : 4 x 3 teams
Q D8
M D10
Confidence : Confident
Supply : Normal
Armor : 1D
Weapon : blaster (= laser)
Support : -
Special : -
FIREPOWER : 5D (1D/figure + laser)

Commandos
Fireteam : 4 x 2 teams
Q D10
M D10
Confidence : High
Supply : Normal
Armor : 1D
Weapon : blaster (= laser)
Support : -
Special : Stealth
FIREPOWER : (5D (1D/figure + laser)

Captain Barka
Positive Leader
Q : D8
M : D12
Confidence : High
Supply : Normal
Armor : 1D (luck...)
Weapon : blaster (= laser)
Support : -
Special : leader
FIREPOWER : 1D (1D/figure)

Vargo Sumb
Q : D8
M : D10
Confidence : High
Supply : Normal
Armor : 1D (luck...)
Weapon : blaster (= laser)
Support : -
Special : medic
FIREPOWER : 1D (1D/figure)

Cal Madsen & Drewbacca
Positive Leader (un seul)
Q : D10
M : D12
Confidence : High
Supply : Normal
Armor : 1D (luck...)
Weapon : blaster (= laser)
Support : -
Special : sniper team (+2D, stealthy)
FIREPOWER : 6D (1D/figure + sniper + weapon team + laser)

Syl Plyton (dependent)

BOUNTY HUNTERS
Fireteam : 4 x 1 team
Q : D10
M : D10
Confidence : Confident
Supply : Normal
Armor : 1D
Weapon : blaster (= laser)
Support : (Dengar) heavy blaster (Lt, AP:1D, AT:1D)
FIREPOWER : 6D (1D/figure + support + laser)


Objectives

EMPIRE
Capture Syl Plyton = Major Objective (5 pts)
Capture Captain Barka = Minor Objective (3 pts)
Capture Vargo Sumb = Minor Objective
Capture an NCO = 2 pts
Each soldier killed/captured = 1 pt

BOUNTY HUNTERS
Capture Cal Madsen alive = Major Objective
Kill Cal Madsen = Minor Objective
Capure Drewbaca vivant = Major Objective
Kill Drewbaca = Minor Objective

REBEL
Syl Plyton flees = Major Objective
Cal Madsen flees = Major Objective
Captain Barka flees = Major Objective
Drewbaca flees = Minor Objective
Vargo Sumb flees = Minor Objective
Each soldier/NCO fleeing = 1 pt

Victory points
Margin of Victory Table
Difference of 0-4 points = Indecisive
Difference of 5 to 9 points = Marginal
Difference of 10 to 14 points = Decisive
Different of 15+ points = Total

Initial Setting :


Les Rebelles commencent tous à couvert (in cover) et les unités furtives (stealth) sont cachées (hidden). L'Empire joue en premier.

Rebels are in cover. Stealthy units are hidden.
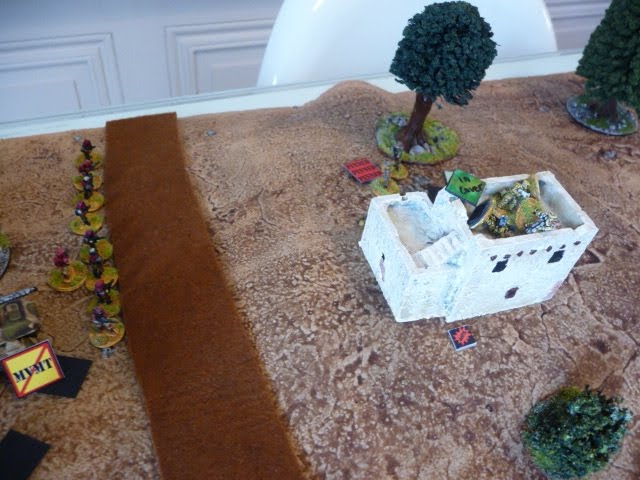
Rebel positions :


TURN 1
Le premier tour les impériaux ont l’initiative. Il faut prendre position pour éviter que les Rebs ne fuient.
Les troupes impériales avancent en essuyant quelques tirs.

Imperials move fast under fire.


Le capitaine Barka mène son groupe hors de sa cachette pour intercepter le groupe du capitaine Lenor.

Cal Madsen et Drewbacca passent sur le flanc gauche en espérant ouvrir la voie au groupe de Vargo Sumb et Syl Plyton. Le groupe de Sumb ayant en charge un dependent (Plyton) est moins efficace (-1FP et rapid move interdit).

Captain Barka leads his group out of hiding to intercept captain Lenor's group.

Cal Madsen and Drewbacca pass on the left flank, hoping to open the way to the group of Vargo Sumb and Syl Plyton. Sumb's group who support a dependent (Plyton) is less effective (no rapid move and -1FP).


TURN 2

Nouvel échange de tirs entre les impériaux et le groupe Barka.

An other exchange of fire between Imperials and Barka's group.


Le groupe de l’officier Lornak passe à l’attaque contre les rebelles déjà émoussés (Team Red). L'échange de tir fait une touche de chaque côté.

Lornak's troopers press forward under fire.


TURN 3

Les rebelles prennent l’initiative !

The Rebels win the initiative roll.

Le commando 2 passe à l’action en attaquant le groupe Lenor de côté. Ils gagnent l’initiative, tirent et font 3 touches dont Lornak. Les stormtroopers échouent au test de moral et deviennent pinned. Ils répliquent sans succès.

Cal Madsen et Drewbacca vise le même groupe et touchent plusieurs fois les survivants. Le groupe est HS.

The Commando 2, Cal Madsen and Drewbacca take Lenor's group in a crossfire. Everybody is down !


Le commando 1 tire sur les chasseurs de primes et font deux touches dont Dengar. Le test de moral est un échec. Ils sont pinned et se mettent à couvert.

The Commando 1 fire against the bounty hunters : two are down (Dengar included) and the others are pinned.


TURN 4

Les rebelles gardent l’initiative.

The Rebels keep the initiative.

Le commando 1 essaie de dégager le passage pour Syl Plyton mais les impériaux tirent en premier mais ne touchent pas. Les commandos répliquent : 3 touches. Le dernier stormtrooper est pinned. Les commandos ont réussi. Syl Plyton est exfiltré ainsi que Barka et son groupe (avec les blessés).

Commandos 1 tries to clear the way for Syl Plyton. The Imperials fire first but do not hit. The commandos reply: 3 hits. The last stormtrooper is pinned. The commandos were successful. Syl is Plyton exfiltrated as Barka and his group (with the wounded).


Madsen se met en position pour le coup de grâce. Il tir le premier et fait deux touches. La réplique fait une touche : Madsen ! Drewbacca tient bon.

Madsen moves into position for the coup de grace. He shot first and made two hits. The stormtroopers shoot back and hit him.


TURN 5

Les rebelles gardent l’initiative.

The Rebels keep the initiative.
A partir de ce tour j’ai dû accélérer pour finir. Les chasseurs de primes ont chargé le groupe de commandos 1 avec les blessés et ont capturé tout le monde.

From this turn I had to accelerate to finish. The bounty hunters go into melee with the group with a commando wounded and captured everyone.


Drewbacca a fait le ménage devant lui. Il ne reste plus d’impériaux pour bloquer la fuite de Drewbacca (portant Madsen) et des quelques commandos survivants.

Drewbacca kill everyone before him. There is no more imperial to block the escape of Drewbacca (with Madsen) and the few surviving commandos.


Les rebelles laissent deux morts et 4 ou 5 prisonniers. C’est une victoire décisive pour la Rébellion.

La partie a duré 6 tours. J’ai passé du temps à consulter la règle (c’était ma 4e partie et la 3e était en juin...) et à prendre des notes : 4 heures de jeu. Le jeu est toujours très plaisant mais comme les concepts sont novateurs s’y replonger demande du temps. Jouer en 25mm (du SW qui plus est) est sympa mais le 15mm est plus adapté à cette taille de table de jeu (120x80).

The rebels left two dead and 4 or 5 prisoners. It is a decisive victory for the Rebellion.

The party lasted 6 turns. I spent some time consulting the rule (this was my fourth game and the 3rd was in June ...) and take notes: 4 hours of play. The game is always very pleasant but as the concepts are innovative it takes time to remember it. Playing in 25mm with SW figures is nice but the 15mm is more suited to this size of my gaming table (120x80).

2010/06/30

Force on Force : Cassius' Corner (avril 2010)

Deuxième partie en solitaire du jeu Force on Force. Je réadapte le scenario Baker's Corner p.108 du livre de règles et le transpose dans l'univers de warhammer 40k.

Second solo play of Force on Force. I modify Baker's Corner scenario (p. 108 of the rules book) and transpose it into the warhammer 40k universe.

Le Blood Pact, un régiment du Chaos, doit effectuer une percée dans les lignes de la Garde Impériales. Le capitaine Cassius en charge de l'arrière garde des troupes impériales doit gagner du temps en résistant à l'avance ennemie. Le Chaos doit sortir deux véhicules par la route de l'ouest. L'un des bâtiments est fortifié.

The Blood Pact (a Chaos regiment) has to make a breakthrough in the Imperial guards lines. Captain Cassius in charge of the rear guard has to spare time by resisting. The Chaos has to exit two vehicles by the western road. One of the buildings is strengthened.


Voici une photo du champ de bataille (avec le nord à gauche par rapport à la carte ci-dessus).

Here is a photo of the battlefield (with the North to the left).


Voici un descriptif des blindés (le Conqueror est le seul blindé appartenant à la Garde).

Here is a description of the armors (the Conqueror is the only AFV belonging to the Guard).


Le Chaos attaque avec six fireteams de 4 soldats menés par le capitaine Kalinski et le prêcheur Ymgiist. Ils sont soutenus par un véhicule de reconnaissance (Mantis), 4 transports de troupes, 5 marcheurs de combat standards (Moloch) et un lourd (Leviathan).
Les forces impériales ne sont composés que de deux chars lourds (Conqueror), 4 fireteams et une arme lourde.

The Chaos attacks with six fireteams of 4 soldiers led by captain Kalinski and preacher Ymgiist. They are supported by a recce vehicle (Mantis), 4 troop transports, 5 standard walkers (Moloch) and a heavy (Leviathan).
The imperial strengths consist only of two heavy tanks (Conqueror), 4 fireteams and a heavy weapon.


Voici quelques détails des forces du Chaos.

Here are some details of the of the Chaos troops.


Les forces impériales.

The imperial troops.


Le commissaire Krenner motive ses troupes.

Commissar Krenner motivates his troops.


LA BATAILLE

tirage des cartes fog of war (drawing fog of war cards):
- chaos / the bell toll (baisse du moral d'un dé : 1d6 !)
- IG / wait the colonel said what !? (pas de mvt au premier tour...)

Du fait de sa supériorité numérique le Chaos va avoir l'initiative toute la bataille.

Because of its numeric superiority the Chaos is going to have the initiative all the battle.

TOUR 1
Le Chaos tire et avance. Le bâtiment renforcé essuie des tirs et s'effondre sans dommages pour les défenseurs. Un Moloch pris pour cible par Cassius est endommagé et le pilote abandonne le char (bail out)...

The Chaos fires and moves. The strengthened building collapses because of numerous shootings (without damage for defenders). Cassius shots and damages a Moloch. The pilot abandons the tank...


TOUR 2
Le squad qui a essuyé les tirs (dans le bâtiment renforcé) se regroupe et s'occupe du blessé (qui en fait n'a rien, juste assommé par un éclat de pierre...).

Cassius est tué par un missile chanceux tiré par un Moloch ! (c'était quand même le troisième missile tiré sur le char...).

Le défenseur fait quelques mouvements. Tentative de tir sur un blindé léger pour le détruire et provoquer des tests de moral... pas de résultats.
Le Gorgone du prêcheur est immobilisé grâce à une action du commissaire Krenner. L'équipage blessé abandonne le char.

Cassius is killed by a missile fired by a Moloch (it was the third missile fired at the tank).


TOUR 3
Fletcher immobilise un Moloch et le pilote s'enfuit.
Le Leviathan endommage le Conqueror de Fletcher (Main weapon) malgré la position défensive (hull down) ! Trois blessés ! Le survivant reste dans le char ! Fletcher est parmi les blessés (il est serieusement touché ; il y a aussi un mort et un blessé léger qui reste aussi dans le char).
Les ruines du bâtiment fortifié sont prises d'assaut et les troupes impériales sont massacrées (y compris les blessés).

Fletcher immobilizes a Moloch and the pilot runs away.
The Leviathan damages Fletcher's Conqueror (main weapon) in spite of the defensive position (hull down)! Three wounded people! The survivor stays in the tank! Fletcher is among the wounded (he is badly wounded ; there is also a dead man and a slightly injured one who also stays in the tank).
The ruins of the strengthened building are assaulted and the imperial troops are massacred.


Le Prêcheur Ymgiist mène l'assaut sur le flanc sud. Le commissaire Krenner résiste.

Preacher Ymgiist leads the assault on the south side. Commissar Krenner resists.


TOUR 4
L'artilleur du char de Fletcher, blessé léger, se met à la tourelle (réussite du TQ avec un niveau de moins), le pilote se prépare à bouger et se charge de la mitrailleuse coaxiale.

Effondrement d'une troisième maison sous les tirs des Moloch. Les défenseurs arrivent à toucher le Moloch (½ FP), le pilote évacue le marcheur et s'enfuit.

Les défenseurs du centre interrompent un Gorgone, gagnent le TQ test et le détruisent au lance rocket ! C'est la panique ! Trois véhicules à proximité ratent leur test de bail out (du fait du moral très faible) dont le Leviathan !

Le dernier char de la garde interrompt un tir sur l'infanterie de l'autre côté de la rue, il rate son interruption et le brave artilleur est touché ! Du coup le pilote abandonne le char et s'enfuit !

L'infanterie dans la maison perd deux hommes, ils répliquent et touchent deux soldats du Chaos.

The defenders of the center interrupt one Gorgon, win the TQ test and destroy with a rocket! It is the panic! Three vehicles miss their moral test (because of the very low morale) of which the Leviathan!

The last tank of the Guard interrupts a shooting on the infantry on the other side of the street, it misses its interruption and the artilleryman is hit! The driver abandons the tank and runs away!


TOUR 5
La grande maison du milieu subit des tirs et les troupes se replient.

Le Mantis est détruit par un tir de lance rocket venant des ruines à côté du char abandonné. Le test de moral n'affecte pas le Moloch à proximité.

The Mantis is destroyed by a rocket coming from ruins next to the abandoned tank. The test of morale does not affect the Moloch near.


TOUR 6
Après avoir essuyé plusieurs tirs les hommes du commissaire répliquent sur le Gorgone et le lance rocket l'immobilise (et l'équipage abandonne le char) ! C'est gagné pour la Garde (il ne reste plus qu'un blindé du Chaos en état de bouger, le Moloch) !

Having suffered several shootings the squad of the commissar shoot back on the Gorgone and a rocket immobilizes it (the crew bail out the tank)! Victory for the Guard (there is not more than one Chaos armored car in state to move, a Moloch)!


BILAN
Partie longue (4h30) mais 1) je connais encore mal la règle et 2) il y a bcp de figurines sur la table. Je regrette de ne pas avoir eu le temps de faire le corps à corps entre le prêcheur et le commissaire.

Blood Pact
6 KIA/WIA dans l'infanterie.
1 Gorgone détruit, 2 endommagés et 1 abandonné sans dommage.
4 Moloch endommagés et abandonnés, un seul en état.
1 Mantis détruit.
1 Léviathan abandonné.

Imperial Guard
un char détruit et un abandonné/endommagé , Cassius tué, Fletcher WIA et abandonné dans son char.
18 KIA/WIA dont le lieutenant Pool (et sans compter les chars).
Un blaster lourd abandonné.

Note : l'effondrement des bâtiments paraît relativement peu meurtrier. La règle est très plaisante et pleine de rebondissements. Je ne pensais pas que la Garde puisse triompher compte tenu de la supériorité de puissance de feu du Chaos.

The Butcher's Bill

- for the Chaos
6 KIA/WIA.
1 Gorgone destroyed, 2 damaged (left behind) and 1 left behind without damage.
4 Moloch damaged and left behind , only one battle ready.
1 Mantis destroyed.
1 Léviathan left behind
.

- for the Imperial Guard
1 tank destroyed
1 tank damaged and left behind (with Fletcher inside)
18 KIA/WIA + Cassius killed and Fletcher WIA and left behind.
1 heavy blaster left behind.


As usual with Force on Force a very great game ! I never thought that the IG could win !

Dramatis Personae :
- Imperial Guard : Ground Zero Games
- Chaos : Rebel Minis
- Commissar : Khurasan Miniatures
- Buildings : Gauthey Miniatures
- Vehicles ; Ground Zero Games except for the Moloch & Leviathan
- Moloch & Leviathan : Rackham Games

2010/06/23

The Wasteland : Agony in Stony Places (mars 2010)

Premier test en solo de Force on Force LA règle d'Ambush Alley Games (AAG). Le scenario joué est choisi dans le supplément réservé au Special Operators Group d'AAG intitulé The Wasteland. Je transpose l'univers médieval-post apoc-futuriste du scénario dans l'univers warhammer 40k.

First test of Force on Force, THE rule of Ambush Alley Games (AAG). The scenario played is selected in the supplement The Wasteland (Special Operators Group supplement). I transpose the medieval world - post-apoc - futuristic scenario in the warhammer 40k universe.

AGONY IN STONY PLACES


Le champ de bataille vu du Nord.

The battlefield from the North.


Les forces du chaos organisent une reconnaissance en force du champ de bataille. Ils surgissent du Nord (donc du bas de la photo). Ils doivent traverser le fossé et pousser plus loin en balayant la faible résistance impériale.

The forces of chaos organize a reconnaissance in force on the battlefield. They arise from the North (ie from the bottom of the photo). They must cross the gully and push further into imperial land.


Les forces en présence

The opposing forces


Les forces de reconnaissance du Chaos (en bas) regroupent 9 fireteams et deux transports de troupes. L'ensemble est composé de soldats entraînés.
Les forces impériales (en haut) n'ont que 6 fireteams au début de la bataille : 3 de milice et 3 de vétérans (dont un groupe d'élite avec le commandant Prufrock en armure lourde).

Reconnaissance forces of Chaos (bottom) include nine Fireteam and two troop transports. The platoon is composed of trained soldiers.
The imperial forces (above) have only six fireteams early in the battle, three militias and three veterans (including an elite group with commander Prufrock in heavy armor).


Les forces du Chaos attaquent en masse avec les blindés. Une mine explose et immobilise un des blindés.

The forces of Chaos attack massively with armors. A mine explodes and immobilizes an armor.


Les forces impériales fléchissent devant l'assaut. Les pertes sont lourdes.

The imperial forces bend before the storm. The losses are heavy.


Le commandant Prufrock résiste.

The commander Prufrock resists.


Mais il finit, lui aussi, par être touché.

But eventually he is hit too.


Les forces du Chaos traversent le fossé et avancent en territoire impérial.

The forces of Chaos cross the gully and move into imperial territory.


Des renforts arrivent (dont le lieutenant en armure lourde) mais ils finissent encerclés...

Reinforcements arrive (including a lieutenant with heavy armor), but they end up surrounded ...


Une victoire écrasante du Chaos malgré l'immobilisation de leurs deux blindés.

A crushing Chaos victory.

Au final les règles de Force on Force sont dynamiques, faciles à maîtriser (après quelques lectures quand même) avec un rendu très réaliste (autant que je puisse en juger). Un excellent jeu.

Force on Force rules are dynamic, easy to learn (after some reading anyway) with a very realistic rendering (as far as I can tell). An excellent game.