Just a quick note about a card game I just bought. After two solo games I recommend Space Hulk: Death Angel. It goes fast, it's bloody, it requires thinking and you never get bored. In short, perfectly in the spirit of the boardgame. For a more complete analysis click here.
2011/04/05
Space Hulk : Death Angel
Juste un petit mot pour dire tout le bien que je pense d'un jeu de cartes que je viens d'acheter. Après deux parties en solitaire je recommande Space Hulk : Death Angel. Cela va vite, c'est sanglant, cela demande de la réflexion et l'on ne s'ennuie pas. Bref, parfaitement dans l'esprit du jeu de plateau. Pour une analyse plus complète on peut aller voir ici.
Just a quick note about a card game I just bought. After two solo games I recommend Space Hulk: Death Angel. It goes fast, it's bloody, it requires thinking and you never get bored. In short, perfectly in the spirit of the boardgame. For a more complete analysis click here.


Just a quick note about a card game I just bought. After two solo games I recommend Space Hulk: Death Angel. It goes fast, it's bloody, it requires thinking and you never get bored. In short, perfectly in the spirit of the boardgame. For a more complete analysis click here.
2011/04/04
Ragdush! (Caer Fingaard's Saga #2)
Aowyn Hillad mène, avec son groupe, une nouvelle mission de patrouille sur la route de Brionne. Pourquoi les raids gobelins sont-ils plus nombreux et mieux organisés ? Ils doivent avoir un nouveau chef. Il faut parvenir à l'identifier.
Aowyn Hillad leads, with his group, a new mission to patrol the Brionne's road. Why raiding goblins are more numerous and better organized? They must have a new leader. It must be achieved to identify him.


Aowyn Hillad sépare son groupe en deux et envoie Mag Afaynydd reconnaître le PEF 3 : un groupe de trainards (CV=11, 4 gobelins, 5 chevaucheurs de loups, 2 archers)
Aowyn Hillad separates the group into two and sends Mag Afaynydd to recognize PEF 3 : stragglers (CV=11, 4 gobs, 5 riders, 2 archers).


Le Test of Will donne le même nombre de succès. Personne ne bouge. Les archers tirent et l'archer keltoï tue un archer gobelin. Cela provoque une panique et tous les gobelins fuient !
With the same number of successes with the Test of Will, nobody moves. The keltoï archer kills a goblin archer archer. This causes a panic and all goblins flee!

Après ce succès, Aowyn Hillad regroupe ses troupes et avance vers les deux autres PEF le groupe principal et un groupe secondaire avec Ragdush, le chef gobelin en personne
After this success, Aowyn Hillad gathers his troops and moves toward the other two PEF: stragglers and main body with the goblin chief, Ragdush.


Les considérables forces gobelines s'activent en premier. Les archers tirent sans effet et les loups chargent !
The mighty goblin forces activate first. Archers shoot for nothing and wolves attack.
PEF 4 = 12cv
5 Gobs
2 Black Moon Gobs
3 Archers
PEF 1 = 17cv
7 Gobs
4 Archers
4 Riders
1Big Bad, Ragdush (Black Moon Gob : Rep 4, AC 4, Hard 4)


The Fight:
RIDERS
REP 3d + 1d larger base +1d spear first turn (for some) = 4d or 5d
KELTOI
REP + 1d spear first turn + 1d frenzy -1d terror
Le combat est sanglant. Un chevaucheur de loup et blessé ainsi qu'un keltoï. Aowyn Hillad est tué et le chevaucheur de loup poursuit (ride through) sur Caer. Le combat finit en match nul.
Le Leader Lost Test est tiré :
2 keltoïs se retirent (retire)
1 s'enfuit (rout)
The fight is bloody. A rider and a keltoï are wounded. Aowyn Hillard is killed and the riders rides through on Caer. The fight ends in a draw.
The Leader Lost Testis taken:
2 keltoïs withdraw (retire)
1 ran (rout)


T6: Keltoïs=6 ; Goblins=4
Les loups chargent mais deux sont tués et le dernier fuit ! Après plusieurs fuites Ragdush décide de replier ses troupes. Ces guerriers humains sont trop agressifs (on dirait des orcs !).
Wolves attack but two are killed and the last flees! After several other routs, Ragdush decides to withdraw his troops. These human warriors are too aggressive (they look like orcs!).
Epilogue
Les keltoïs récupèrent le blessé et rentrent au camp avec une information capitale : l’identité du chef gobelin qui orchestre les raids dans la région : le célèbre Ragdush ! Par ailleurs, Mag Afaynydd est heureux de la mort d'Aowyn Hillard : il peut reprendre son commandement.
Epilogue
The keltoïs recover the wounded and return to the camp with an important information: the identity of the leader who orchestrates the goblin raids in the area: the famous Ragdush! In addition, Mag Afaynydd is pleased with the death of Aowyn Hillard: he may resume his command.
Advancement & Replacement
Aowyn Hillad leads, with his group, a new mission to patrol the Brionne's road. Why raiding goblins are more numerous and better organized? They must have a new leader. It must be achieved to identify him.


Aowyn Hillad sépare son groupe en deux et envoie Mag Afaynydd reconnaître le PEF 3 : un groupe de trainards (CV=11, 4 gobelins, 5 chevaucheurs de loups, 2 archers)
Aowyn Hillad separates the group into two and sends Mag Afaynydd to recognize PEF 3 : stragglers (CV=11, 4 gobs, 5 riders, 2 archers).
Le Test of Will donne le même nombre de succès. Personne ne bouge. Les archers tirent et l'archer keltoï tue un archer gobelin. Cela provoque une panique et tous les gobelins fuient !
With the same number of successes with the Test of Will, nobody moves. The keltoï archer kills a goblin archer archer. This causes a panic and all goblins flee!

Après ce succès, Aowyn Hillad regroupe ses troupes et avance vers les deux autres PEF le groupe principal et un groupe secondaire avec Ragdush, le chef gobelin en personne
After this success, Aowyn Hillad gathers his troops and moves toward the other two PEF: stragglers and main body with the goblin chief, Ragdush.
Les considérables forces gobelines s'activent en premier. Les archers tirent sans effet et les loups chargent !
The mighty goblin forces activate first. Archers shoot for nothing and wolves attack.
PEF 4 = 12cv
5 Gobs
2 Black Moon Gobs
3 Archers
PEF 1 = 17cv
7 Gobs
4 Archers
4 Riders
1Big Bad, Ragdush (Black Moon Gob : Rep 4, AC 4, Hard 4)


The Fight:
RIDERS
REP 3d + 1d larger base +1d spear first turn (for some) = 4d or 5d
KELTOI
REP + 1d spear first turn + 1d frenzy -1d terror
Le combat est sanglant. Un chevaucheur de loup et blessé ainsi qu'un keltoï. Aowyn Hillad est tué et le chevaucheur de loup poursuit (ride through) sur Caer. Le combat finit en match nul.
Le Leader Lost Test est tiré :
2 keltoïs se retirent (retire)
1 s'enfuit (rout)
The fight is bloody. A rider and a keltoï are wounded. Aowyn Hillard is killed and the riders rides through on Caer. The fight ends in a draw.
The Leader Lost Testis taken:
2 keltoïs withdraw (retire)
1 ran (rout)
T6: Keltoïs=6 ; Goblins=4
Les loups chargent mais deux sont tués et le dernier fuit ! Après plusieurs fuites Ragdush décide de replier ses troupes. Ces guerriers humains sont trop agressifs (on dirait des orcs !).
Wolves attack but two are killed and the last flees! After several other routs, Ragdush decides to withdraw his troops. These human warriors are too aggressive (they look like orcs!).
Epilogue
Les keltoïs récupèrent le blessé et rentrent au camp avec une information capitale : l’identité du chef gobelin qui orchestre les raids dans la région : le célèbre Ragdush ! Par ailleurs, Mag Afaynydd est heureux de la mort d'Aowyn Hillard : il peut reprendre son commandement.
Epilogue
The keltoïs recover the wounded and return to the camp with an important information: the identity of the leader who orchestrates the goblin raids in the area: the famous Ragdush! In addition, Mag Afaynydd is pleased with the death of Aowyn Hillard: he may resume his command.
Advancement & Replacement
2011/04/02
(WHAA) Advancement & Replacement
Suite au combat contre l'ogre les survivants se soignent et récupèrent. Mag Afaynydd est dégradé et Aowyn Hillad prend sa place à la tête de la bande. Deux archers sont recrutés dans les fiannas (bandes) de réserve.
After the battle against the ogre all the survivors rest and recover. Mag Afaynydd is degraded and Aowyn Hillad takes his place at the head of the fianna (band). Two archers are recruited from the reserve fiannas (bands).


X = replacement.
After the battle against the ogre all the survivors rest and recover. Mag Afaynydd is degraded and Aowyn Hillad takes his place at the head of the fianna (band). Two archers are recruited from the reserve fiannas (bands).

X = replacement.
2011/04/01
Ogre's Wrath (Caer Fingaard's Saga #1)
Après quelques tirages de dés la première aventure de Caer Fingaard prend forme. Le groupe de Caer est envoyé patrouiller du côté de la route de Brionne, théatre de nombreux raids de gobelins.
After a few dice rolls Caer Fingaard's first adventure takes shape. Caer's group is sent to patrol the Brionne's road where many goblins raids have been reported.


Le chef de la bande, Mag Afaynydd, décide de gravir la colline ouest pour avoir une vue dégagée sur la route (carré n°7). Cela permet de révéler les trois PEF (Possible Enemy Force).
The leader, Mag Afaynydd, decides to climb the hill west (square No.7) to get a clear view of the road. This reveals the three PEF (Possible Enemy Force).


Les deux premiers PEF sont des fausses alarmes, le troisième se révèle être un groupe de traînards composés de deux chevaucheurs de loups, un gobelin, un archer, un black moon goblin et un ogre. Thendag tire une flèche, rate. L'archer gobelin réplique et le tue ! Les tests de moral (crisis test) sont ratés en cascade. Sept keltoïs se replient d'un mouvement en arrière (retire) tandis que trois autres (dont le chef) s'enfuient (rout) !
The first two PEF are false alarms, the third proves to be a group of stragglers consisting of two wolf riders wolf, a goblin, an archer, a black moon goblin and an ogre.Thendag shoots an arrow and misses. The goblin archer shoots back and kills Thendag! The crisis tests (test crisis) are cascading failures. Seven keltoïs fall a movement back (retire). The last three rout (including the chief)!
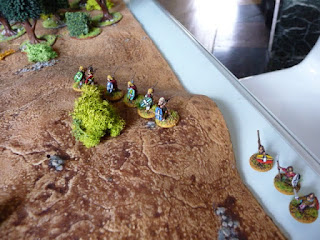

TURN 2: Keltoï=3 ; Goblin=5
Seul l'ogre réussit son test de course et avance vite. Profitant de son isolement Caer encourage ses camarades à charger l'ogre. Malheureusement le test de course est un échec.
Only the ogre passes his fast move test and moves fast. Taking advantage of his isolation Caer encourages his friends to charge the ogre. Unfortunately the test fast move test is a failure.
TURN 3: Keltoï=1 ; Goblin=2
Les gobelins jouent les premiers. Les chevaucheurs de loup testent pour charger (avec -1d contre position défensive) et décident de rester où ils sont. Il en va de même pour les gobelins à pied. L'archer gob vise Dwaewin et le rate. Ce dernier (frenzy) charge l'archer en réaction, le percute en le faisant reculer, puis le tue (OD). Cette charge terrifiante impressionne tellement les gobelins que tous déroutent (crisis test). L'ogre ne bouge pas, impavide.
Goblins play first. The wolf riders test to charge (with-1d against a defensive position) and decide to stay where they are. It's the same for the goblins on foot. The goblin archer aims Dwaewin and misses. The latter (frenzy) charges the archer in reaction and kills him (OD). This charge is so terrifying that all the goblins rout (crisis test). The ogre does not move, fearless.


Caer prépare ses hommes à la charge contre l’ogre (charge test). Les deux camps réalisent chacun 3 réussites. Mais le test de course donne pass=0, tout le monde ne va pas arriver au contact (les pieds nus dans les buissons épineux cela ralentit...).
Caer prepares his men to charge the ogre (charge test). Both sides realize each 3 successes. But the fast move test is a failure (pass = 0 dice), everyone will not get to the fight (bare feet in thorny bushes...).
Ogre : 5d (REP) + 1d larger base - 1d outnumbered = 5d
Keltoïs : 4d (REP) + 1d frenzy +1d spear first round - 1d terror = 5d
Dices are rolled and... you can see the number of success on the picture below :


Caer est OD et trompe la mort (cheat death) étant une star. Des trois autres, deux sont tués (OD) et le dernier est blessé gravement (OOF). Les deux derniers survivants se replient (retire).
Caer is OD and (as a star) cheats death. Two other keltoïs are killed (OD) and the last is seriously injured (OOF). The last two survivors withdraw (retire).
TURN 4: Keltoï=6 ; Goblin=5
L'ogre charge Gromamond et après un tour de combat (evenly matched) le blesse gravement (OOF).
The ogre attacks Gromamond and after a turn of fight (evenly matched) wounds him (OOF).
Ogre : 5 +1 larger base = 6
Gromamond : 4 -1 terror +1 frenzy +1 uphill -1 outnumbered + 1 spear on the first turn = 5


Il ne reste qu'un survivant, Dwaewin qui est aussi le seul a avoir tué un gobelin... Il va chercher des secours.
It remains only one survivor, Dwaewin who is also the only one to have killed a goblin ... He will seek help.

Un bien piètre résultat pour des mercenaires d'élite...
A very poor outcome for elite mercenaries ...
FIGURES : Corvus Belli & Magister Militum
After a few dice rolls Caer Fingaard's first adventure takes shape. Caer's group is sent to patrol the Brionne's road where many goblins raids have been reported.


Le chef de la bande, Mag Afaynydd, décide de gravir la colline ouest pour avoir une vue dégagée sur la route (carré n°7). Cela permet de révéler les trois PEF (Possible Enemy Force).
The leader, Mag Afaynydd, decides to climb the hill west (square No.7) to get a clear view of the road. This reveals the three PEF (Possible Enemy Force).
Les deux premiers PEF sont des fausses alarmes, le troisième se révèle être un groupe de traînards composés de deux chevaucheurs de loups, un gobelin, un archer, un black moon goblin et un ogre. Thendag tire une flèche, rate. L'archer gobelin réplique et le tue ! Les tests de moral (crisis test) sont ratés en cascade. Sept keltoïs se replient d'un mouvement en arrière (retire) tandis que trois autres (dont le chef) s'enfuient (rout) !
The first two PEF are false alarms, the third proves to be a group of stragglers consisting of two wolf riders wolf, a goblin, an archer, a black moon goblin and an ogre.Thendag shoots an arrow and misses. The goblin archer shoots back and kills Thendag! The crisis tests (test crisis) are cascading failures. Seven keltoïs fall a movement back (retire). The last three rout (including the chief)!
TURN 2: Keltoï=3 ; Goblin=5
Seul l'ogre réussit son test de course et avance vite. Profitant de son isolement Caer encourage ses camarades à charger l'ogre. Malheureusement le test de course est un échec.
Only the ogre passes his fast move test and moves fast. Taking advantage of his isolation Caer encourages his friends to charge the ogre. Unfortunately the test fast move test is a failure.
TURN 3: Keltoï=1 ; Goblin=2
Les gobelins jouent les premiers. Les chevaucheurs de loup testent pour charger (avec -1d contre position défensive) et décident de rester où ils sont. Il en va de même pour les gobelins à pied. L'archer gob vise Dwaewin et le rate. Ce dernier (frenzy) charge l'archer en réaction, le percute en le faisant reculer, puis le tue (OD). Cette charge terrifiante impressionne tellement les gobelins que tous déroutent (crisis test). L'ogre ne bouge pas, impavide.
Goblins play first. The wolf riders test to charge (with-1d against a defensive position) and decide to stay where they are. It's the same for the goblins on foot. The goblin archer aims Dwaewin and misses. The latter (frenzy) charges the archer in reaction and kills him (OD). This charge is so terrifying that all the goblins rout (crisis test). The ogre does not move, fearless.
Caer prépare ses hommes à la charge contre l’ogre (charge test). Les deux camps réalisent chacun 3 réussites. Mais le test de course donne pass=0, tout le monde ne va pas arriver au contact (les pieds nus dans les buissons épineux cela ralentit...).
Caer prepares his men to charge the ogre (charge test). Both sides realize each 3 successes. But the fast move test is a failure (pass = 0 dice), everyone will not get to the fight (bare feet in thorny bushes...).
Ogre : 5d (REP) + 1d larger base - 1d outnumbered = 5d
Keltoïs : 4d (REP) + 1d frenzy +1d spear first round - 1d terror = 5d
Dices are rolled and... you can see the number of success on the picture below :
Caer est OD et trompe la mort (cheat death) étant une star. Des trois autres, deux sont tués (OD) et le dernier est blessé gravement (OOF). Les deux derniers survivants se replient (retire).
Caer is OD and (as a star) cheats death. Two other keltoïs are killed (OD) and the last is seriously injured (OOF). The last two survivors withdraw (retire).
TURN 4: Keltoï=6 ; Goblin=5
L'ogre charge Gromamond et après un tour de combat (evenly matched) le blesse gravement (OOF).
The ogre attacks Gromamond and after a turn of fight (evenly matched) wounds him (OOF).
Ogre : 5 +1 larger base = 6
Gromamond : 4 -1 terror +1 frenzy +1 uphill -1 outnumbered + 1 spear on the first turn = 5
Il ne reste qu'un survivant, Dwaewin qui est aussi le seul a avoir tué un gobelin... Il va chercher des secours.
It remains only one survivor, Dwaewin who is also the only one to have killed a goblin ... He will seek help.
Un bien piètre résultat pour des mercenaires d'élite...
A very poor outcome for elite mercenaries ...
FIGURES : Corvus Belli & Magister Militum
CAER FINGAARD’S SAGA
I plan to play a Warrior Heroes: Armies and Adventures Campaign with Caer Fingaard, a Keltoï (Riata ; for the background see Rally Round The King) mercenary.
Caer Firgaard
Riata Warrior
REP : 4 Hardiness : 1 Social Standing : 0
Weapon : Lance
Armor : no (AC 2)
Movement : 8/16
Class : Melee Troop
Characteristics :
Elite trained
Frenzy
Firgaard is part of an hundred strong Keltoï (Riata) mercenary company working for the Escalath Duchy (Border Kingdoms) in war with the goblins.
Il fait partie d’une compagnie d’une centaine de mercenaires gaëls à la solde du Duché d’Escalath (Border Kingdoms) en guerre contre les gobelins.
He’s on duty on the border.
Il est en poste à la frontière.
In the Gael’s culture honour takes the first part. Ways of fighting depend upon weapons and are linked to honour. So a REP 3 warrior fights with a bow, a REP 4 with a spear (Gaesatae) and a REP 5 with a sword (Gaël).
When a young warrior becomes REP 4 he earns the frenzy characteristic.
After that, the first characteristic earned is hardiness (as per the rules).
Other characteristics are earned at a level of REP-2.
Le groupe (fianna) de 10 guerriers auquel Caer appartient possède les caractéristiques suivantes :
The 10 strong warriors group (fianna) has these characteristics:


Figures : Corvus Belli
Caer Firgaard
Riata Warrior
REP : 4 Hardiness : 1 Social Standing : 0
Weapon : Lance
Armor : no (AC 2)
Movement : 8/16
Class : Melee Troop
Characteristics :
Elite trained
Frenzy
Firgaard is part of an hundred strong Keltoï (Riata) mercenary company working for the Escalath Duchy (Border Kingdoms) in war with the goblins.
Il fait partie d’une compagnie d’une centaine de mercenaires gaëls à la solde du Duché d’Escalath (Border Kingdoms) en guerre contre les gobelins.
He’s on duty on the border.
Il est en poste à la frontière.
In the Gael’s culture honour takes the first part. Ways of fighting depend upon weapons and are linked to honour. So a REP 3 warrior fights with a bow, a REP 4 with a spear (Gaesatae) and a REP 5 with a sword (Gaël).
When a young warrior becomes REP 4 he earns the frenzy characteristic.
After that, the first characteristic earned is hardiness (as per the rules).
Other characteristics are earned at a level of REP-2.
Le groupe (fianna) de 10 guerriers auquel Caer appartient possède les caractéristiques suivantes :
The 10 strong warriors group (fianna) has these characteristics:


Figures : Corvus Belli
Subscribe to:
Posts (Atom)